For an overview on OwnerRez Widgets, widget setup, etc. look at the Setting up widgets for inquiries, bookings and availability.
We've got a video going through step by step setup for OwnerRez and integration into a WordPress site via Shortcoder.
There are two main ways to add OwnerRez Widgets to your WordPress site -- shortcodes via Shortcoder or page builder plugins via HTML widgets. I'll cover both here, and two common page builders (Beaver Builder and SiteOrigin Page Builder). If you have questions about adding OwnerRez Widgets via a different method, let us know.
Note: these guides are oriented around the setup of widgets for a couple of properties. If you've got many properties and want a parameterized setup that is possible but a bit more complex. Contact us and we'll walk you through that process.
If you get a 403 error when saving widgets in your page builder, here's how to fix it: Fix 403 Error by Whitelisting in WordFence
The OwnerRez WordPress plugin isn't compatible with Wordpress themes or plugins that provide their own booking functionality.
Shortcodes
These steps assume you've already created a page where you want to embed OwnerRez widgets.
- Install the Shortcoder plugin if it's not currently installed.
- Go to Settings > Shortcoder to create a new shortcode:

- Name the shortcode. Note the "Your shortcode is" reference to the right of the Title field -- you'll use this to embed the shortcode later.
- Make sure you have the Text tab selected in the middle right, not the Visual tab.
- Copy the widget code from the OwnerRez widget and paste it into the Content box.
- Create the Shortcode
- Now go to the page where you want to add the widget:

- Enter the "Your shortcode is" reference from the Create shortcode operation
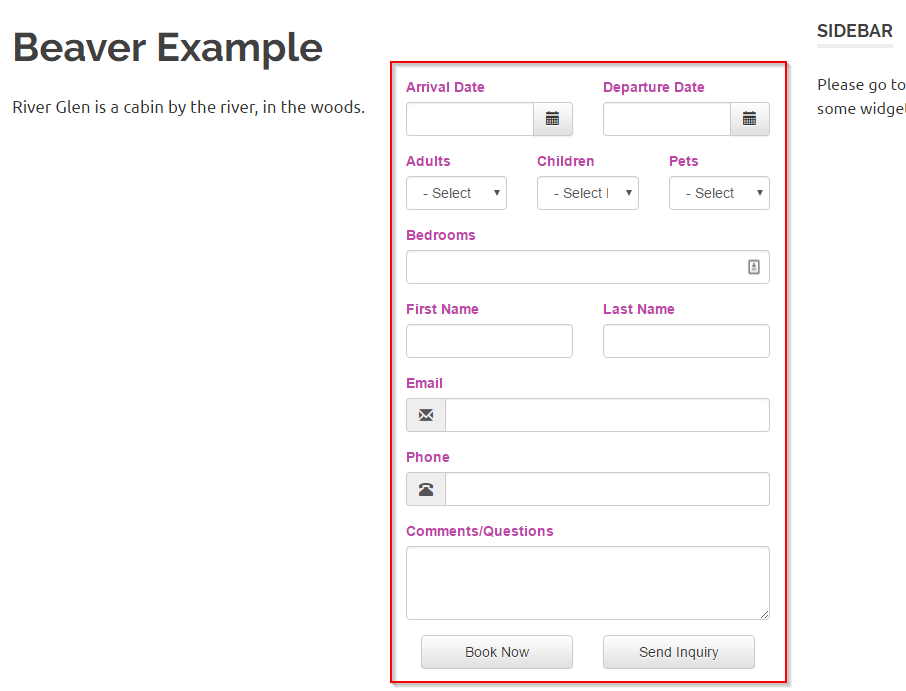
- Save/Publish the page and view it:

If you enter the shortcode and see only code on your page, this is probably because you pasted the code into the Visual tab instead of the Text tab -- it ends up displaying the code on the page instead of executing the code and rendering the widget.
Just switching to the Text tab won't fix it because the code is broken from pasting into the Visual tab.
To solve the problem:
- Switch to the Text tab
- Delete everything in the Text box
- Copy/paste a fresh version of the embed code from OwnerRez into the Text box
Beaver Builder
These steps assume you've already got the Beaver Builder plugin installed, and have created a page where you want to embed OwnerRez widgets.
- Open Beaver Builder to the page you want to edit.
- Click Add Content in the top right:

- Drag an HTML module from the Basic Modules section:

- Copy the widget code from the OwnerRez Widget and paste it into the HTML Settings box:

- Save the HTML settings
- Save/Publish the page and view it:
SiteOrigin Page Builder
These steps assume you've already got the SiteOrigin Page Builder plugin installed, and have created a page where you want to embed OwnerRez widgets.
- Open SiteOrigin Editor to the page you want to edit.
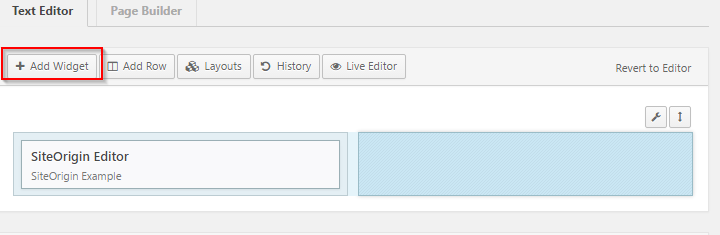
- Click Add Widget to add a new widget:
- Select the Text widget and add it:

- Hover over the Text widget and Edit it:

- Copy the widget code from the OwnerRez Widget and paste it into the Content box:

- Save the Text widget
- Save/Publish the page and view it:
