Starting February 15, 2024, Houfy will require hosts to subscribe to their lite plan in order to list on Houfy. Pricing details can be found here. The reason for the price change can be found here.
OwnerRez has partnered with Houfy to provide an integrated API connection between the two systems. This allows OwnerRez users to more easily handle their listings and bookings.
Our integration pushes listing content, rates, availability and rules to Houfy. (Note: OR does not push your House Rules to Houfy. You will need to add those directly in your Houfy listing.) Houfy guest inquiries will be sent to OR users via email. Users can then provide quotes and allow guests to reserve directly through OwnerRez.
Setup Video
Setup
To get the integration process started:
- Run the Tools > Listing Quality Analyzer tool and fix any errors found. There are also info and warning items for improvement, but there should be no remaining errors to proceed with the integration.
- Under Settings > API Integrations > Connect a Channel, select Connect Houfy API.
- Make sure properties are marked Included. Use the Change Property Mappings button on the Properties tab, enter the Houfy listing number for each OwnerRez property, click the Included box and Save.
- Copy the Account ID shown on your Houfy API Integration page (you'll need this after you log into your Houfy account).

- Log in to your Houfy account and navigate to Channel Managers.
- Choose the option to Connect to OwnerRez. On the next screen enter your OwnerRez account ID which you copied earlier from the Houfy API Integration screen in OwnerRez. Choose Continue.

- From the Houfy Listing dropdown menu, select Create New Listing.
- Select your settings for the sync -
Listing basic information: Overview about property, room details, location, amenities, suitability, activities, etc.Listing rates: Pricing import from OwnerRez to Houfy
Listing availability: Listing availability import from OwnerRez to Houfy -
Map the listing from OwnerRez to Houfy as follows. We suggest you select the boxes for all three options. Then choose the button to "Pull Data". (Please note - not all data in your OwnerRez listings are pushed to Houfy at this time, but work is in progress to improve the integration.)

- Users should add their Houfy listing number (16288 in the example above) to their Houfy Channel Property Mappings.
- Once you're API connected with OwnerRez, Houfy will set the inquiry email address on Houfy to use your entire account inquiry forwarding address so that inquiries are sent into OwnerRez automatically.
- If you have any questions, please contact Houfy support at:
info@houfy.com
And request API integration with OwnerRez.
Houfy setup instructions for OwnerRez
Houfy Pricing
Starting February 15, 2024, OwnerRez users are subject to Houfy Pricing, with a minimum subscription to Houfy's Lite plan. Their pricing is capped at 20 listings, meaning hosts with 20+ listings will pay the same price as 20 listings.
iCal calendar imports
If you are using the Houfy API connection, you do not need any iCal calendar imports from Houfy. If you already have them set up, disable them - otherwise you'll get infinite loops and ghost blocks you can't get rid of.
Delist
Users wishing to delist should see Houfy's How to remove your OwnerRez connection support article for instructions.
FAQs
Where are my House Rules in Houfy?
OwnerRez does not currently pass House Rules to Houfy via the API integration. To add House Rules in your Houfy listing, you will need to log in to your Houfy account > select Manage Listings from the drop down menu at the top, right > in the display for the listing, choose Edit > in the menu on the left choose Settings > then Rules. Enter your rules in the space provided. Click Continue. Your House Rules will be saved.
How do I add a Secondary Email in Houfy so inquiries come into my OwnerRez Account?
Setting a manual email is NO LONGER NECESSARY as Houfy will automatically use your account email address once you're API connected with OwnerRez. These instructions are still here for reference purposes but you shouldn't have to use them.
To make sure your inquiries from Houfy guests are coming into your OwnerRez account, add a Secondary Email within your Houfy listing.
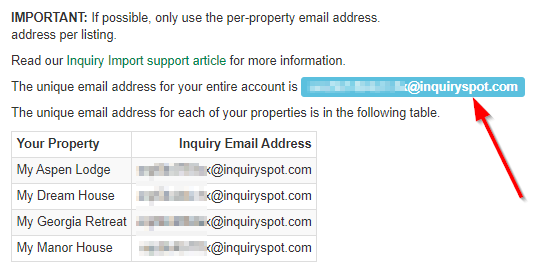
First, navigate in OwnerRez to the Inquiry Email page to find your OwnerRez inquiry emails: https://app.ownerrez.com/inquiries/instructions
Copy the unique email address for your entire account:
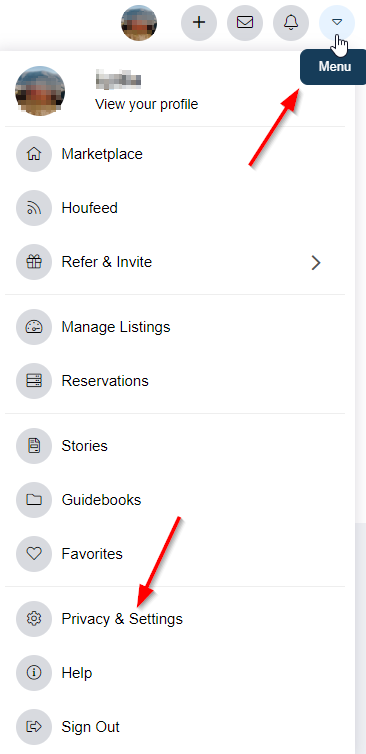
Log into your Houfy account. Select the drop down menu at the top, right and choose Privacy & Settings.
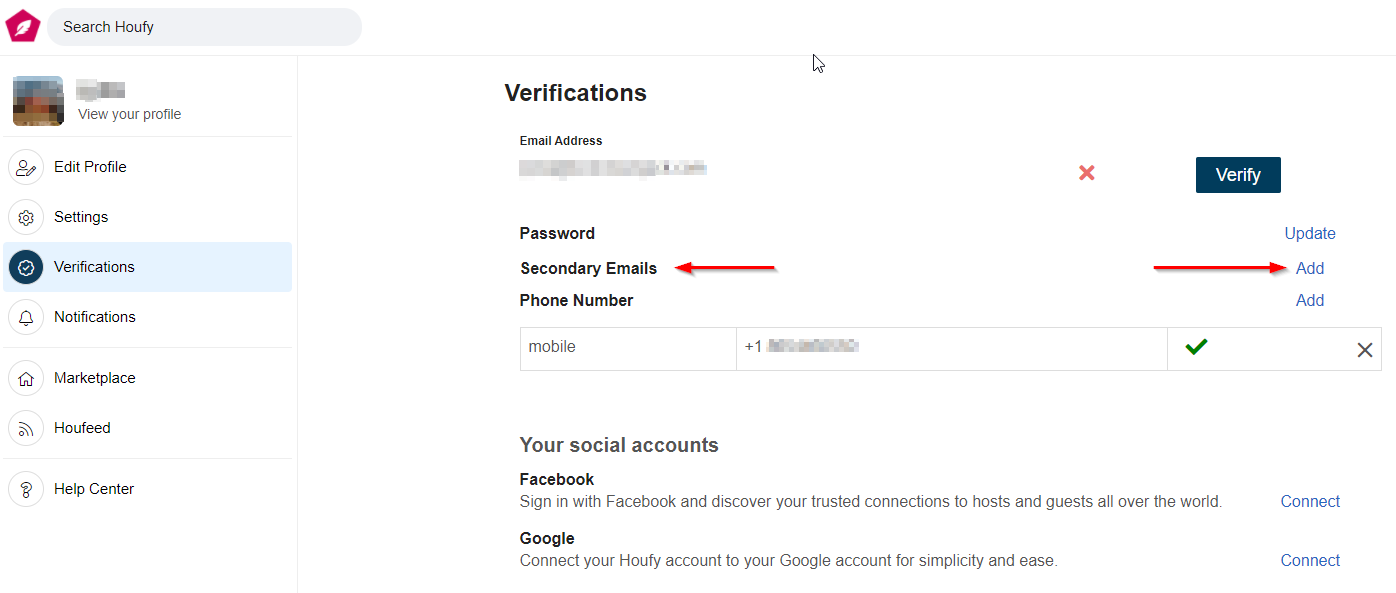
On the next screen choose "Verifications" from the menu on the left. Once on the Verifications page, find the Secondary Emails line add choose "Add" from the right side.
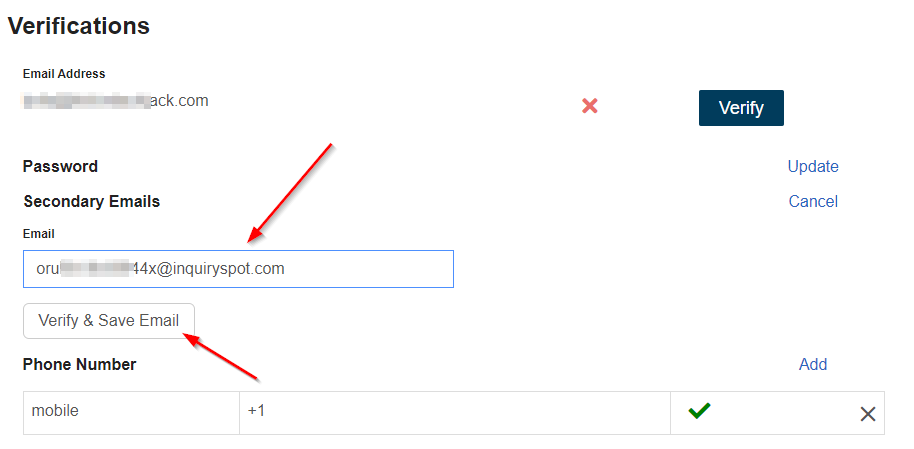
Paste your OwnerRez account email in the box. Click the button to "Verify & Save Email".
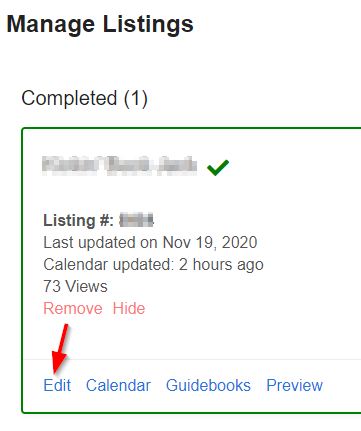
Go to the email mailbox where you receive communication from OwnerRez and look for the verification email from Houfy. Click on the link provided to verify your new Secondary Email. Once verified, this is what you should see in your Houfy account on the Verifications page: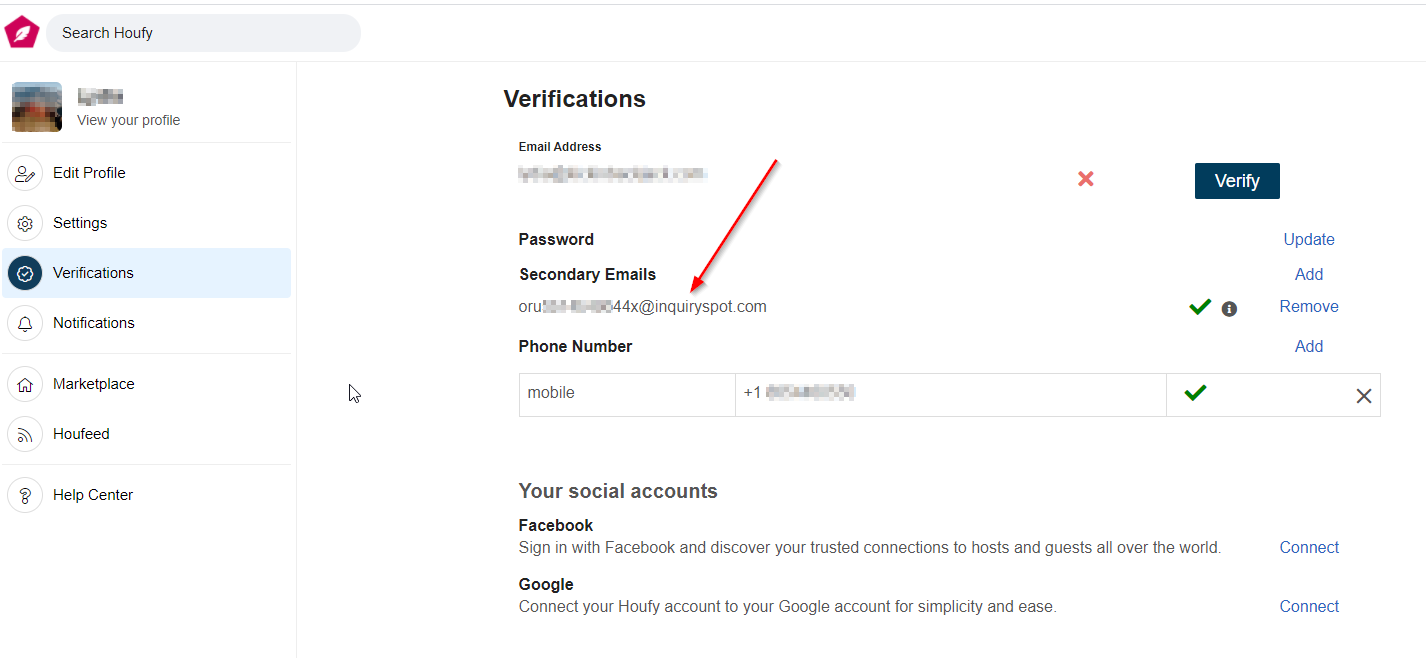 Now go back to the main Houfy Menu and choose Manage Listings. Then select the Edit button from within each listing:
From the menu on the left choose Settings and then pick Settings again. On the following screen you will see a place to select your Contact Email. Use the drop down arrow to select the same OwnerRez account email. Once selected, choose the "Continue" button and you'll be all set.
