The most customizable part of the hosted website is the header layout. The header can be customized specifically for desktop, tablet and phone.
- Steps for customizing the Header Layout
- Line Customization
- Section Customizations
- Favicon
- Links and Text
- Logo
- Add a Background Photo
- Site Menu
Steps for customizing the Header Layout:
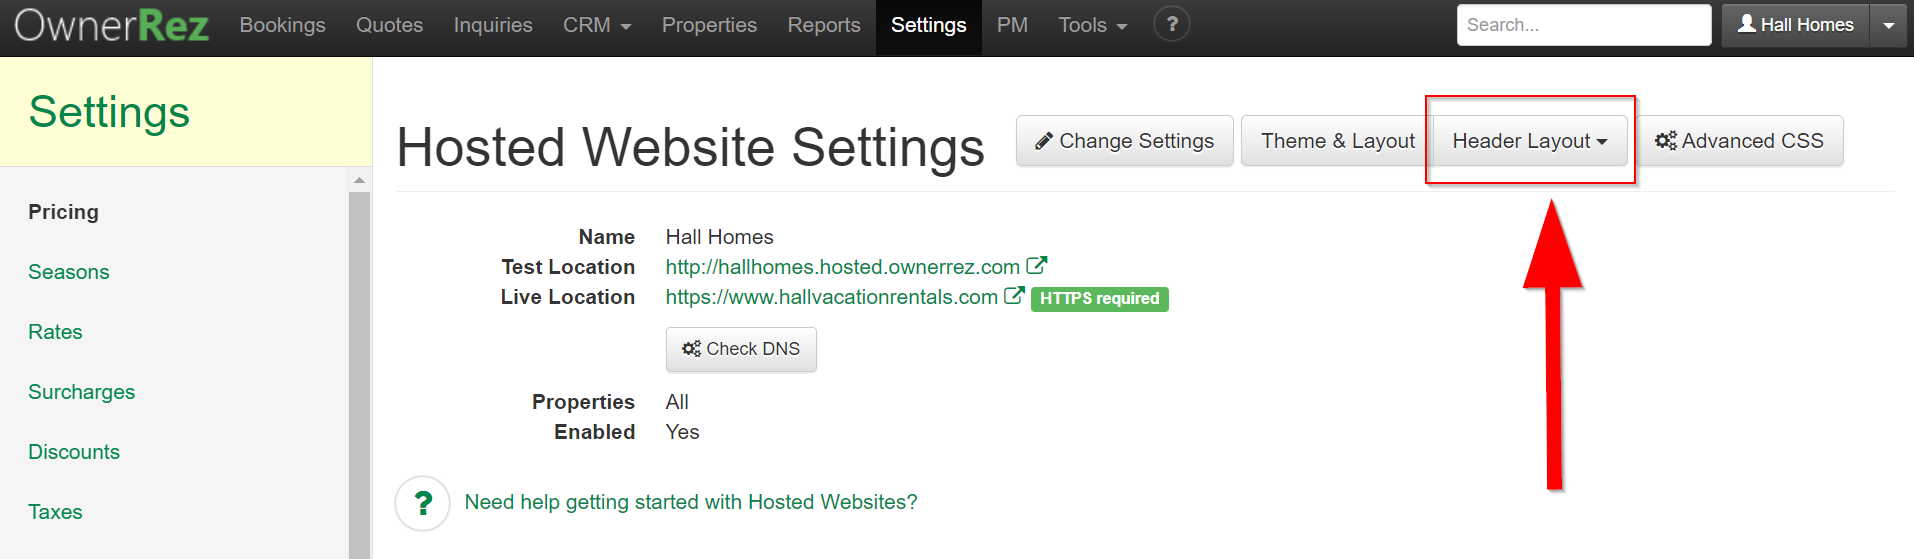
1. Go to hosted websites page inside OwnerRez here. Then select your hosted website.

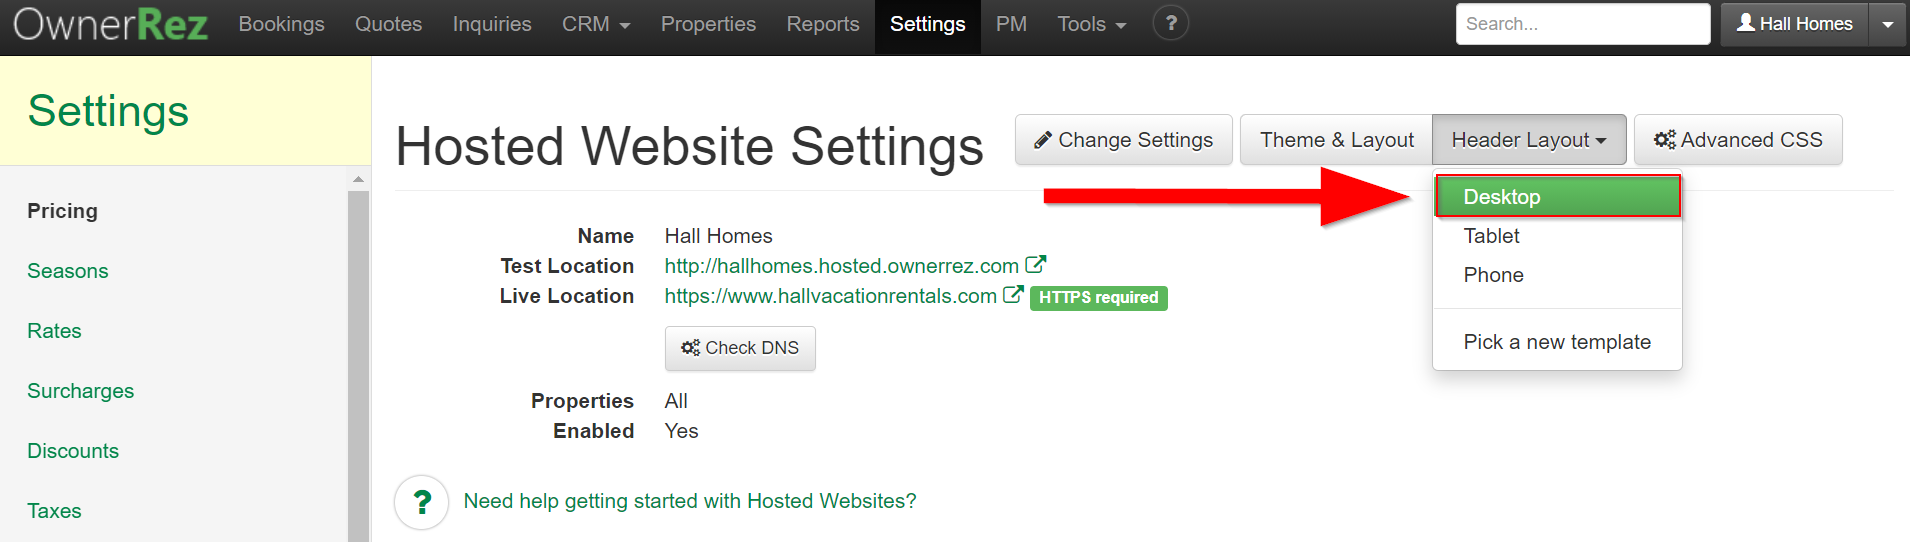
2. Click on Header Layout and select which layout you would like to adjust.
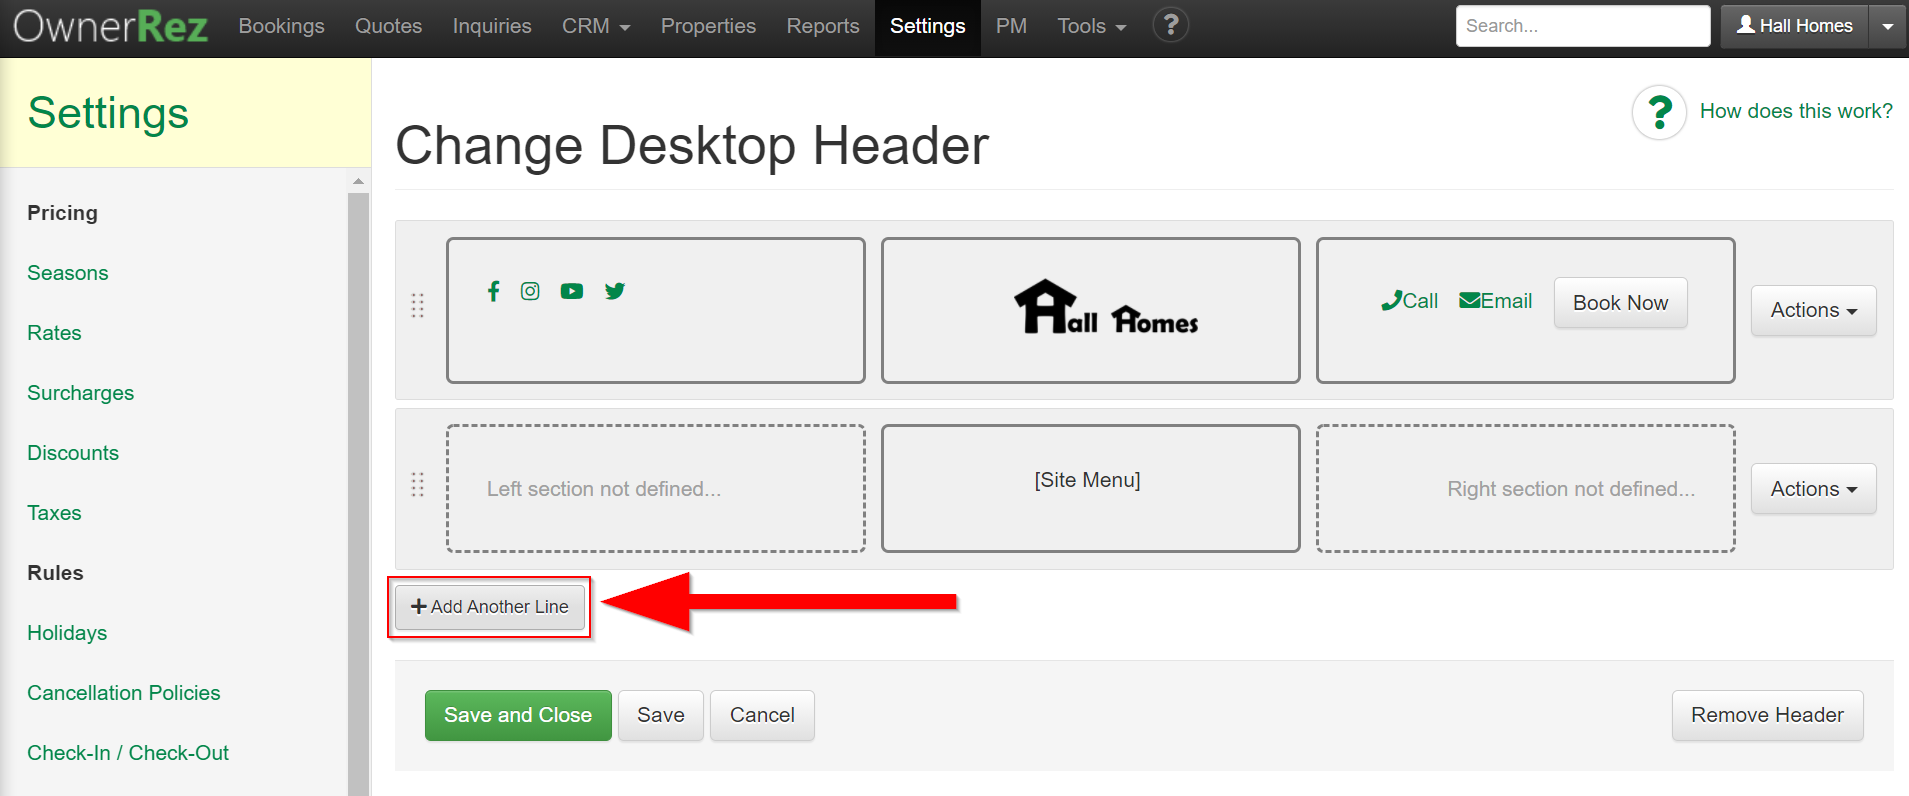
3. Now you'll see Lines and three Sections in each. Below you can see what this looks like inside OwnerRez and live on the hosted site.


Line Customization:
1. You can rearrange the Lines by clicking and dragging the left side of the Line.
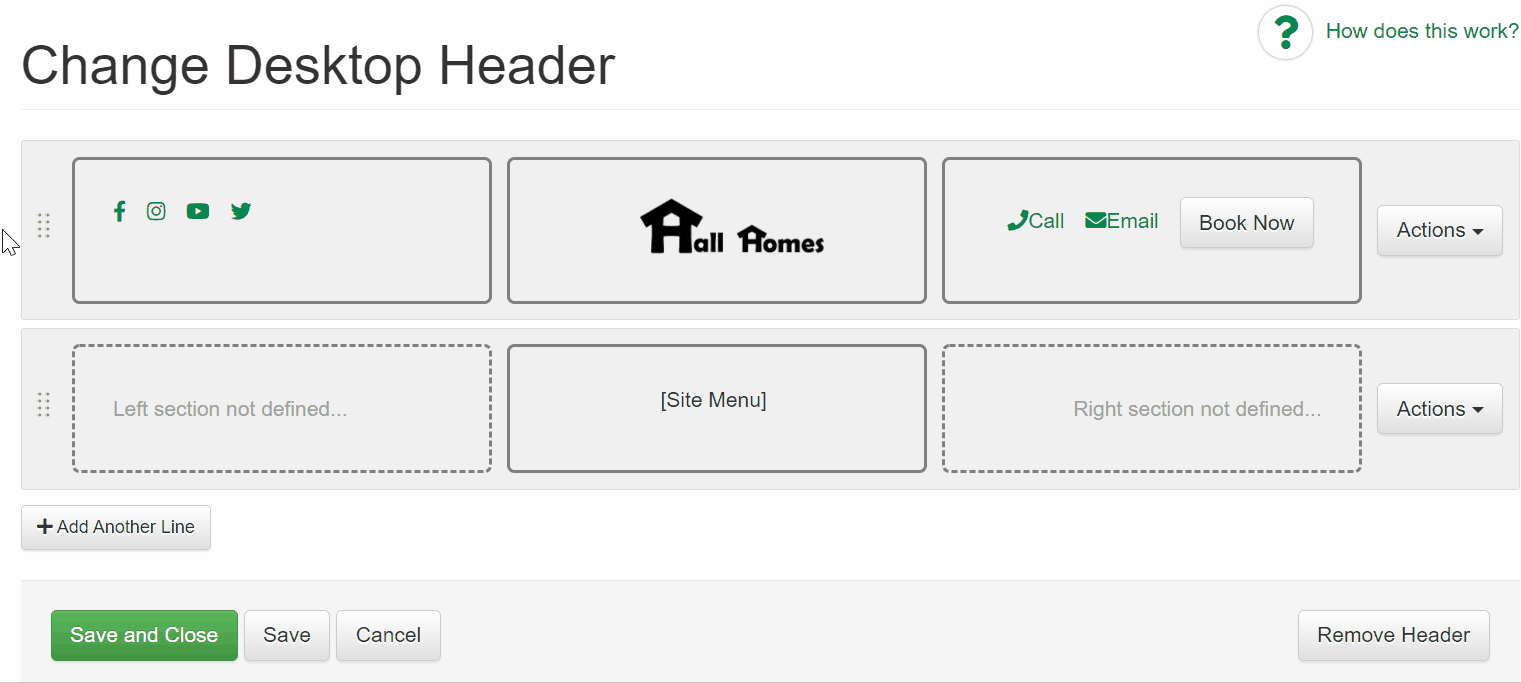

2. You can add more Lines by clicking Add Another Line.
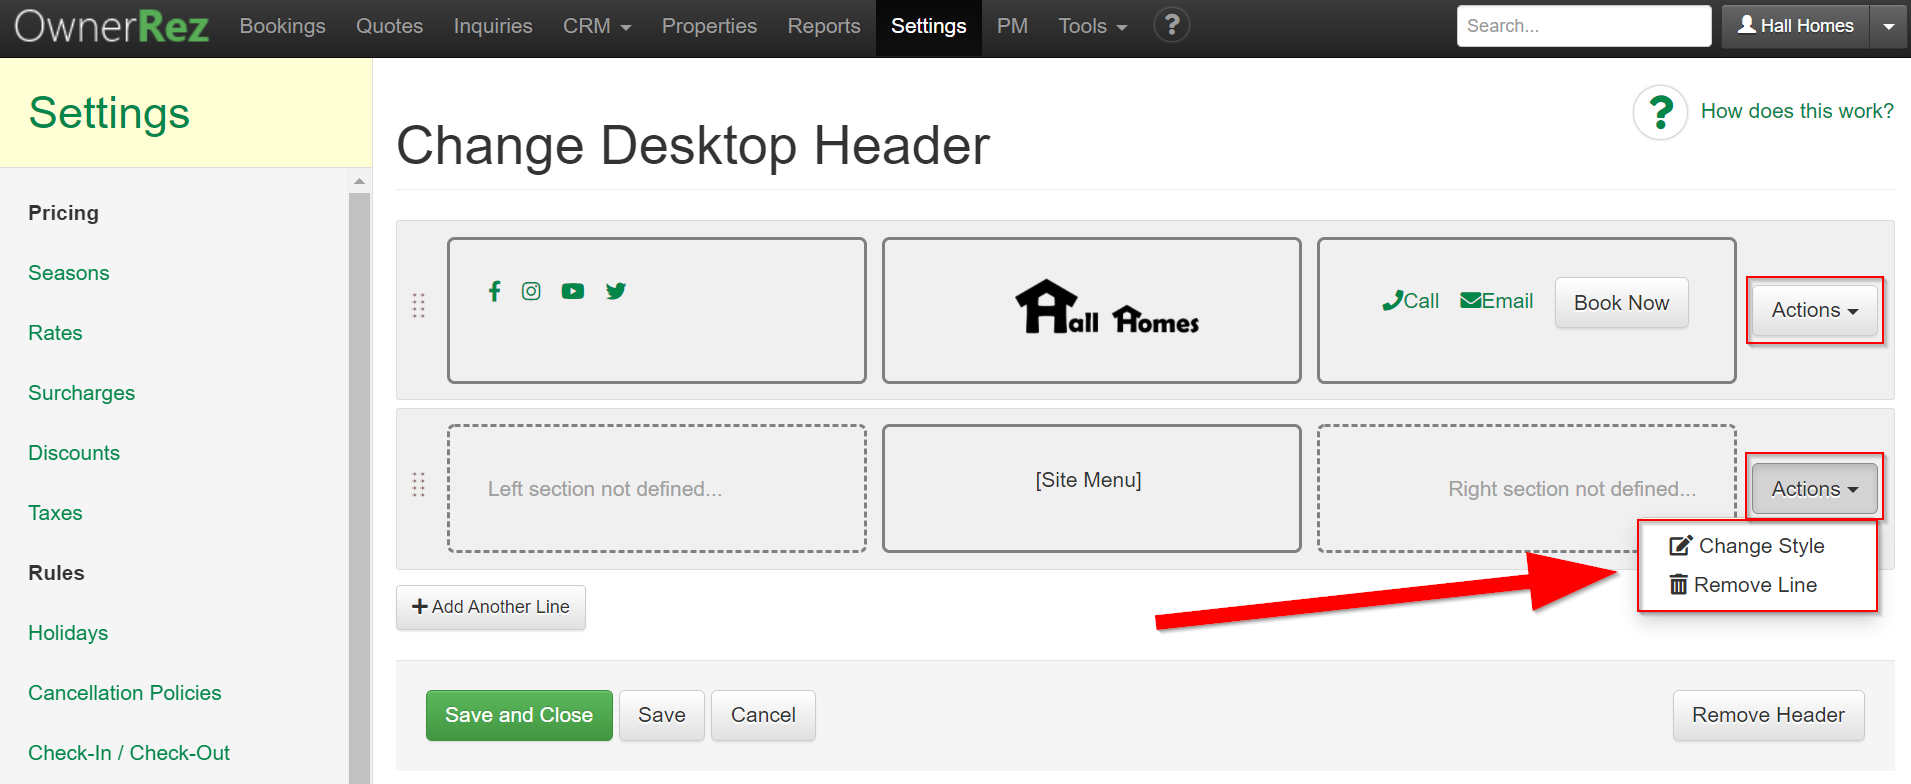
3. You can change the style of the Line and remove Lines by clicking the Actions button on the right side.
4. If you select Change Style, you will be presented with this window. Here you can adjust items such as line background, line padding, font, font size, scroll behavior, 3D and button customizations.

Section Customizations:
1. To customize a Section, click into one of the three Sections inside a Line.
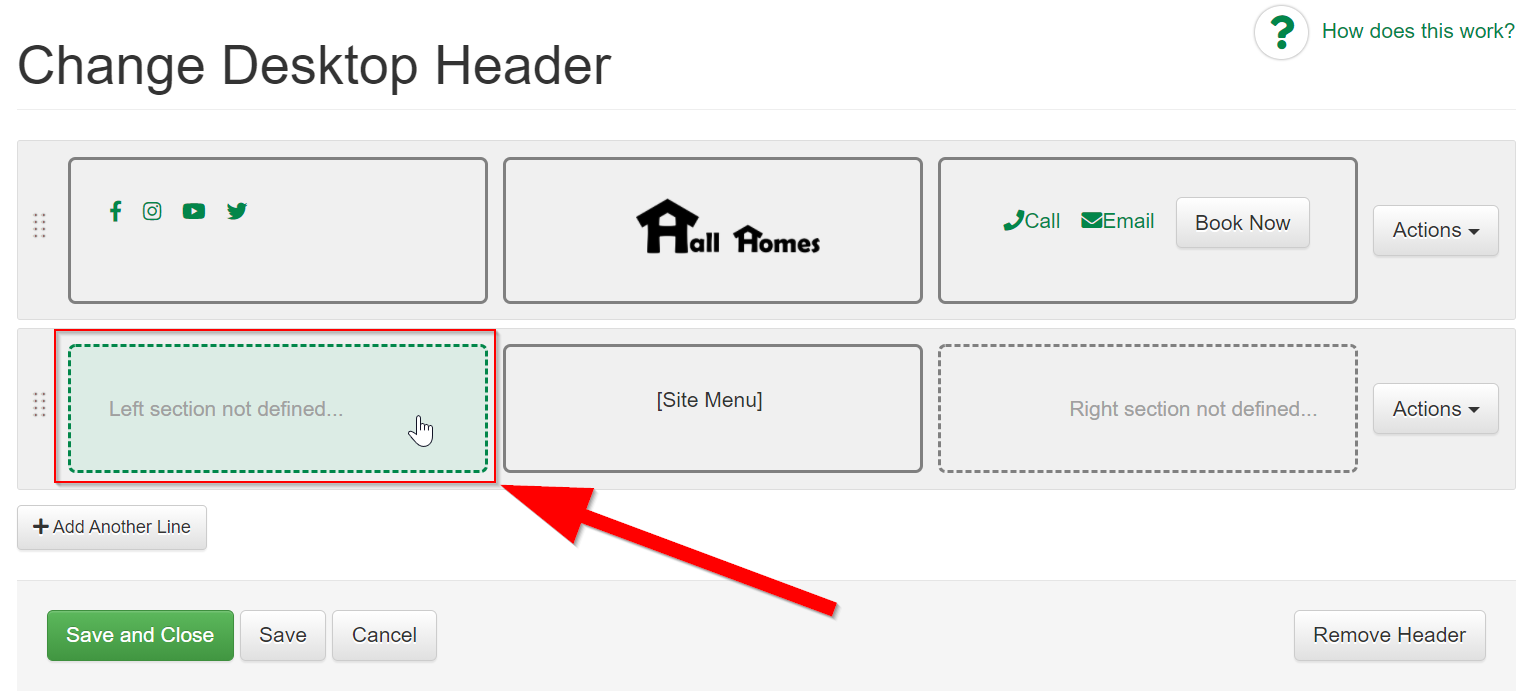
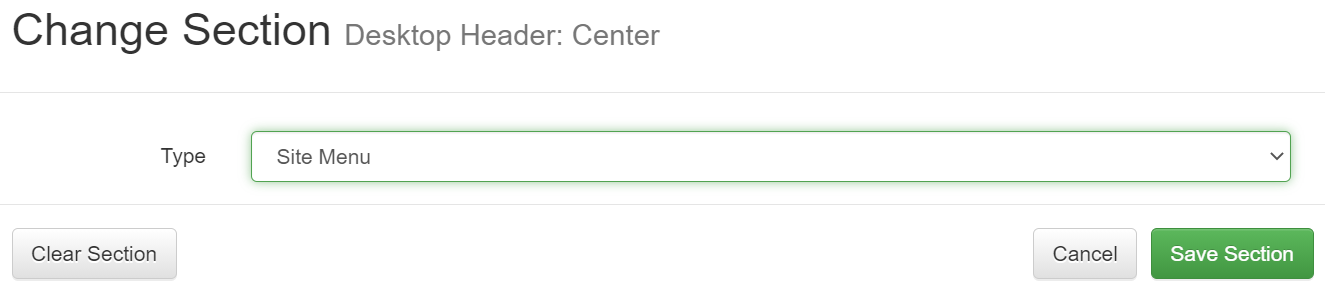
2. Then, if the section is blank, select what type of section you would like to create. There are three types, Links and Text, Logo, and Site Menu.

Favicon
What is a favicon? A favicon is a small icon or collection of icons associated with a website, web page, or web application and is displayed within the browser tabs and bookmarks bar. Check out OwnerRez's favicon.
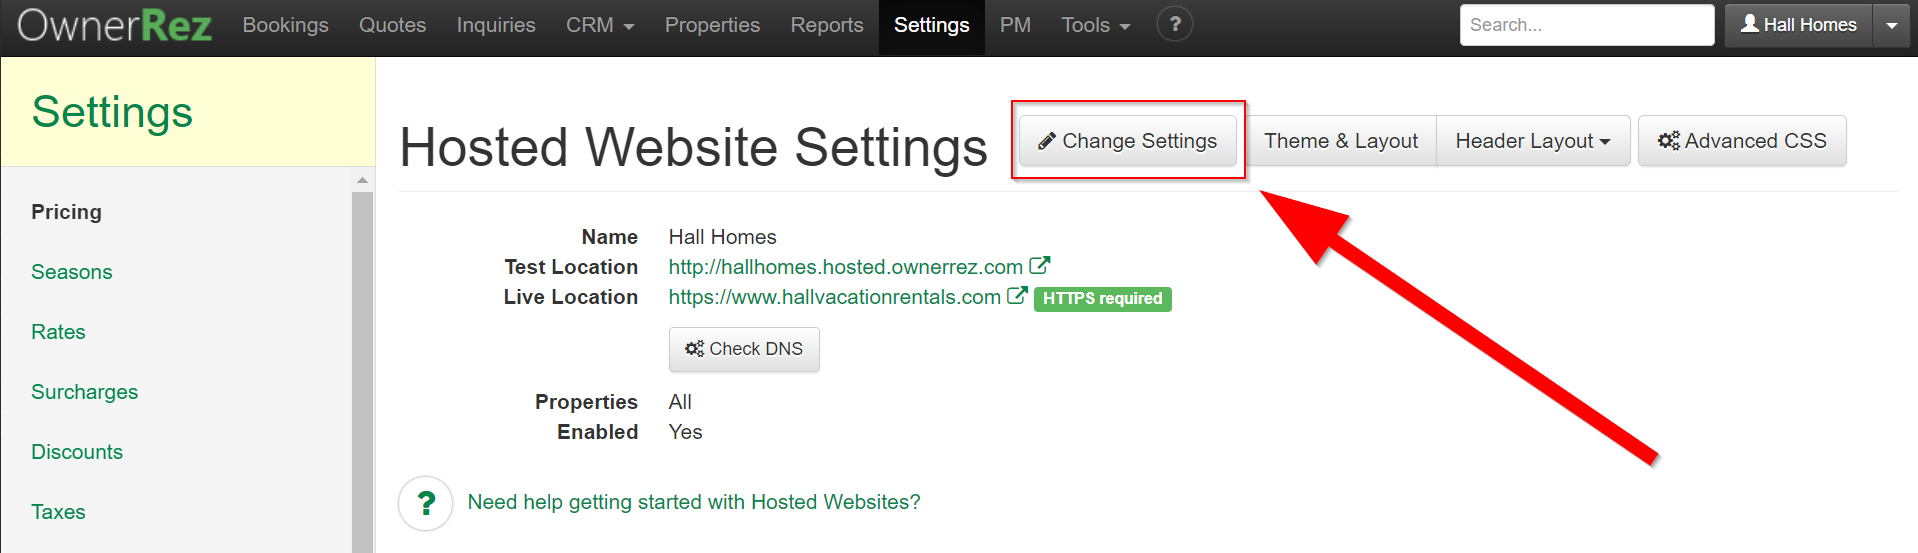
Users can add their own favicon to their hosted website by navigating to Settings > Hosted Website > your specific Hosted Website > Change Settings.
In the Display section, users can upload their favicon file. Users should note that favicons must be square, png or ico format, and no more than 500 Kb in size.
Be sure to click on Save at the bottom of the page.
Links and Text:
1. Links and Text allows you add multiple types of items by clicking Add Link. Once you click Add Link, select from the type dropdown what you'd like to include. The options are Link, Button, Text Only and Site Menu.


2. If you select Link or Button, you then need to select what Action you want. The Actions you can choose from are: My Email, My Phone, Page, Social Network, Other Email, Other Phone, Other URL.

- My Email will fill in the email you have set in your OwnerRez theming.
- My Phone will fill in the phone number you have set in your OwnerRez theming.
- Page allows you to select a specific website page you'd like to link to.
- Social Network allows you to select one of the social links you have set in your OwnerRez theming.
- Other Email allows you to add in a specific email address you'd like to link to.
- Other Phone allows you to add in a specific phone number you'd like to link to.
- Other URL allows you to add in a specific URL you'd like to link to.
3. Once you select the Action, you can set the icon you'd like to display for that link/button.

- To insert an icon, click the drop-down arrow and search and select an icon.
4. Now you can choose what text you'd like displayed for this link/button. If you'd like the text to be the same as what you set for the Action (ex. your email address), then leave this set to default. If you set an icon, and you only want that displayed, change default to custom and do not put anything in the "Specify Text" box.
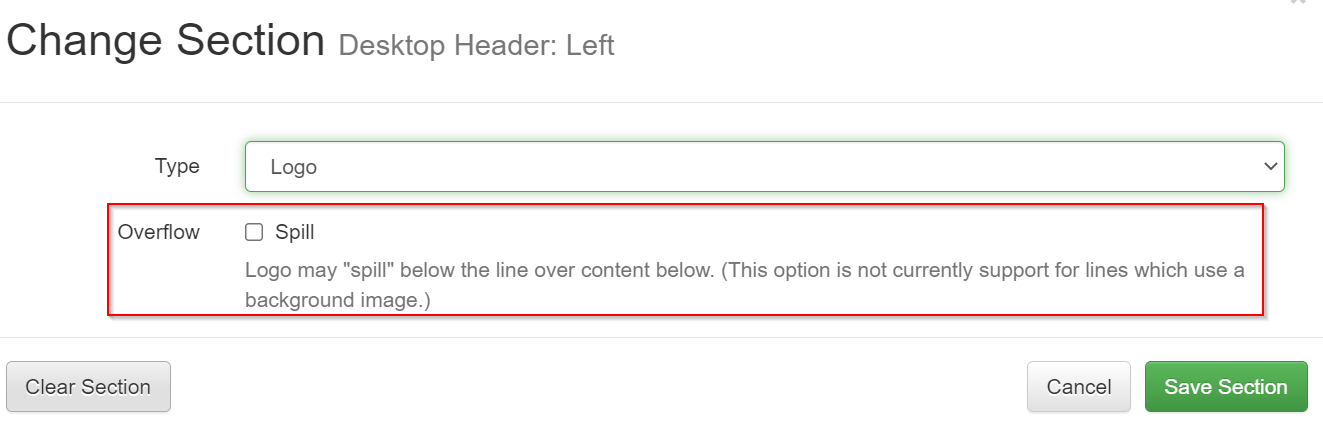
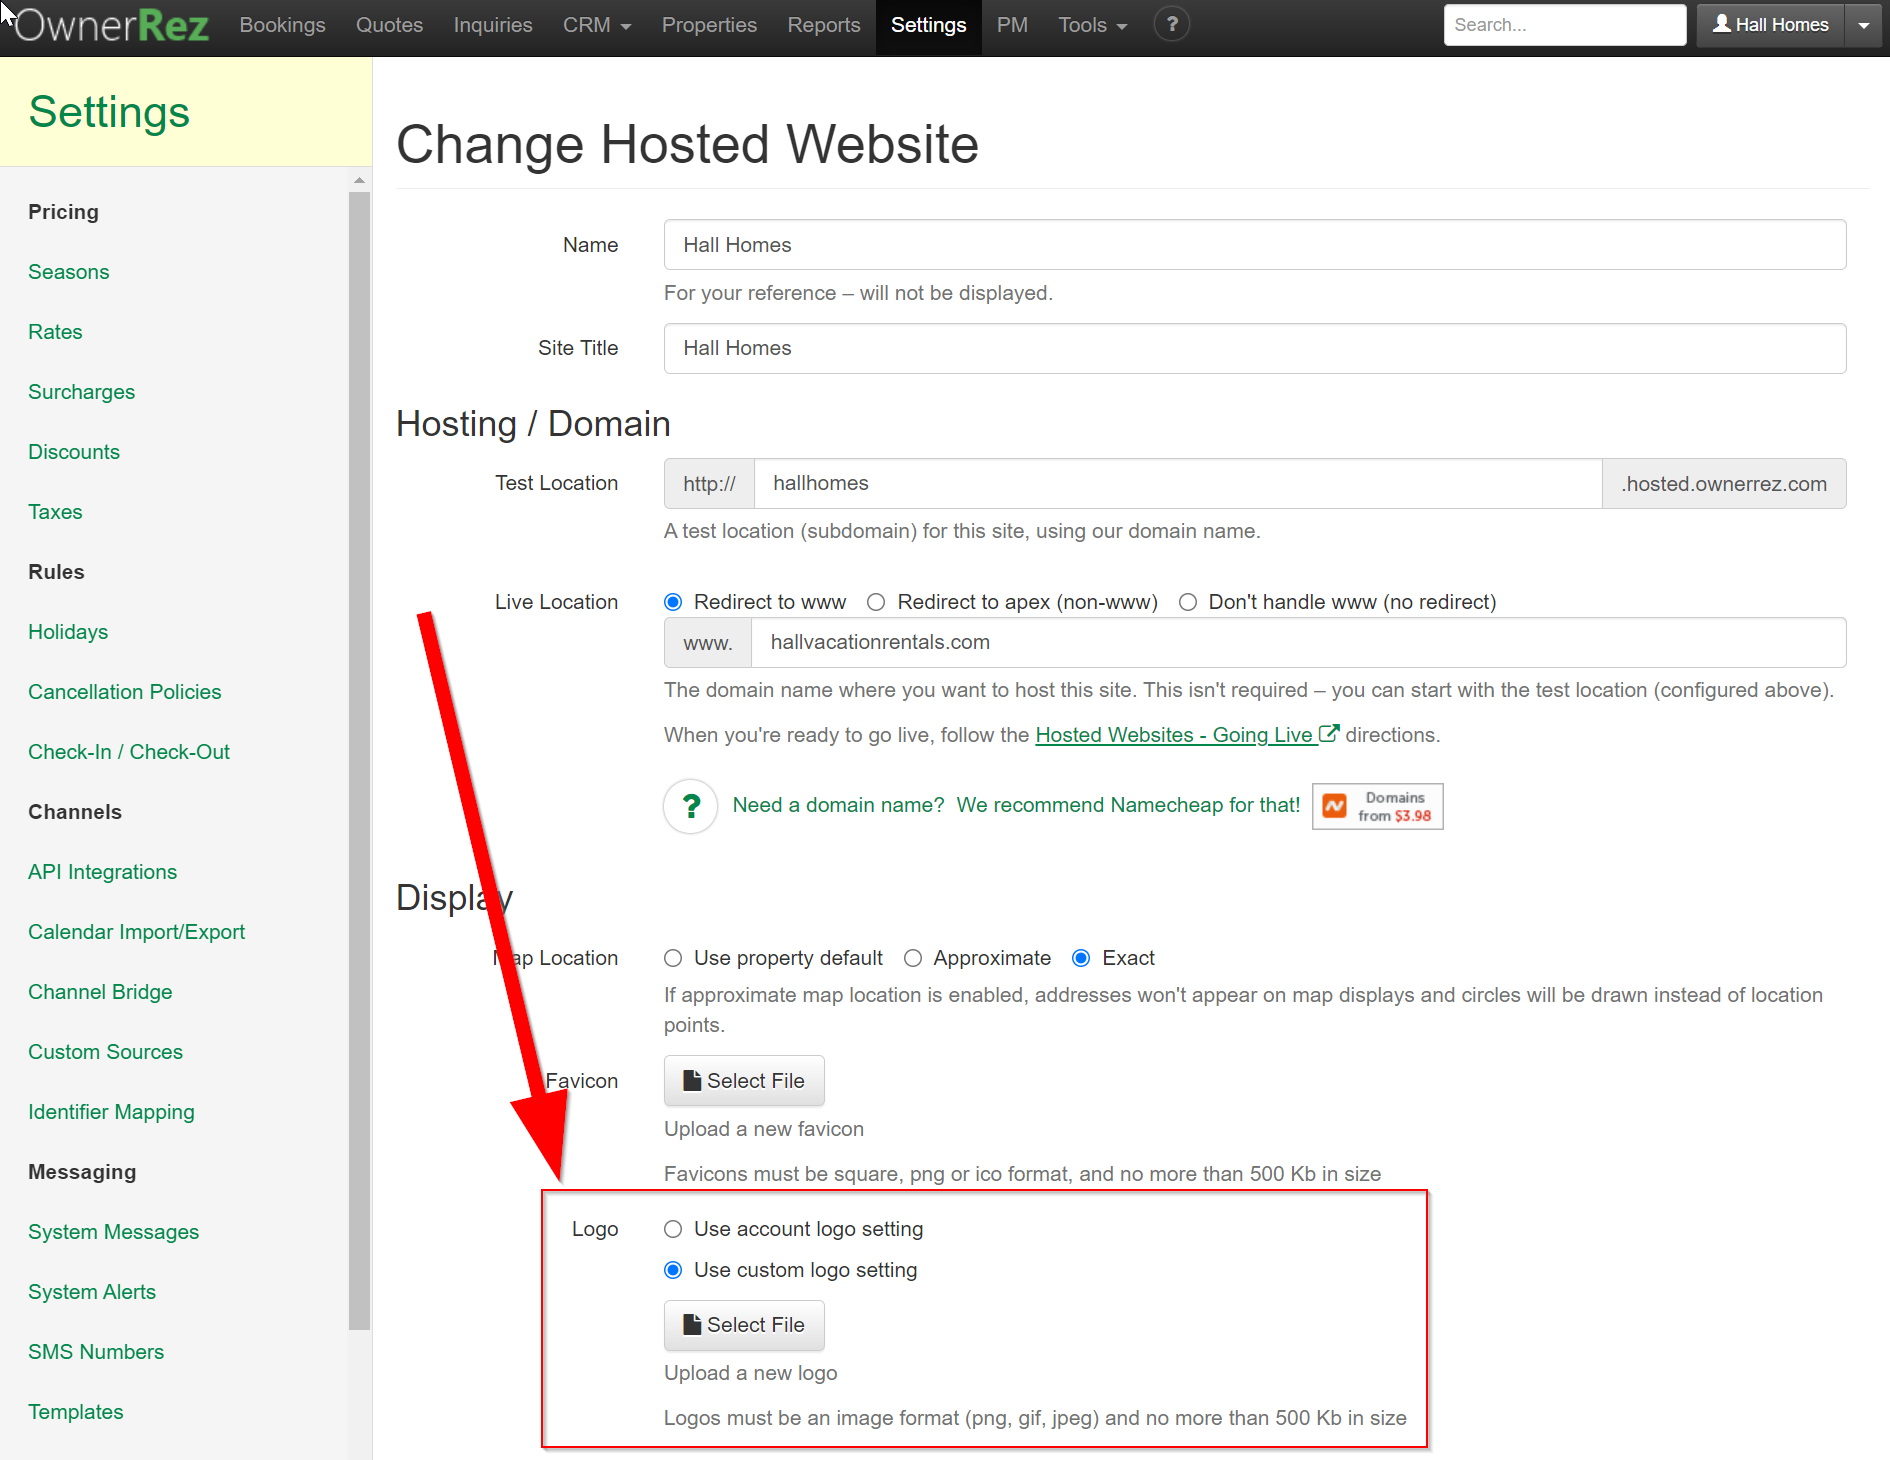
Logo:
If you select Logo as your Section type, the logo you have set in your theme settings will be added. You can choose to allow the logo to "spill" below the line over content below.
If you'd like to use a different logo on your hosted site, than what's set for your theming, you can set this by going to your hosted website settings.
Then select "Use custom logo" and add the logo file.
Add a Background Photo
Users can navigate to Settings > My Website > Hosted Website > the website they wish to edit > Header Layout > Desktop.
From the Action drop-down menu on the upper right side, select Change Style.
The Change Line Style pop-up modal will appear. In the Design > Line Background section, users can click on the Upload an image radio button and add their image file by clicking on the Select Image button.
Users can also choose to add a background color by clicking on the Pick a color radio button. Be sure to save your selection by clicking on Save Styles on the bottom right of the pop-up modal.
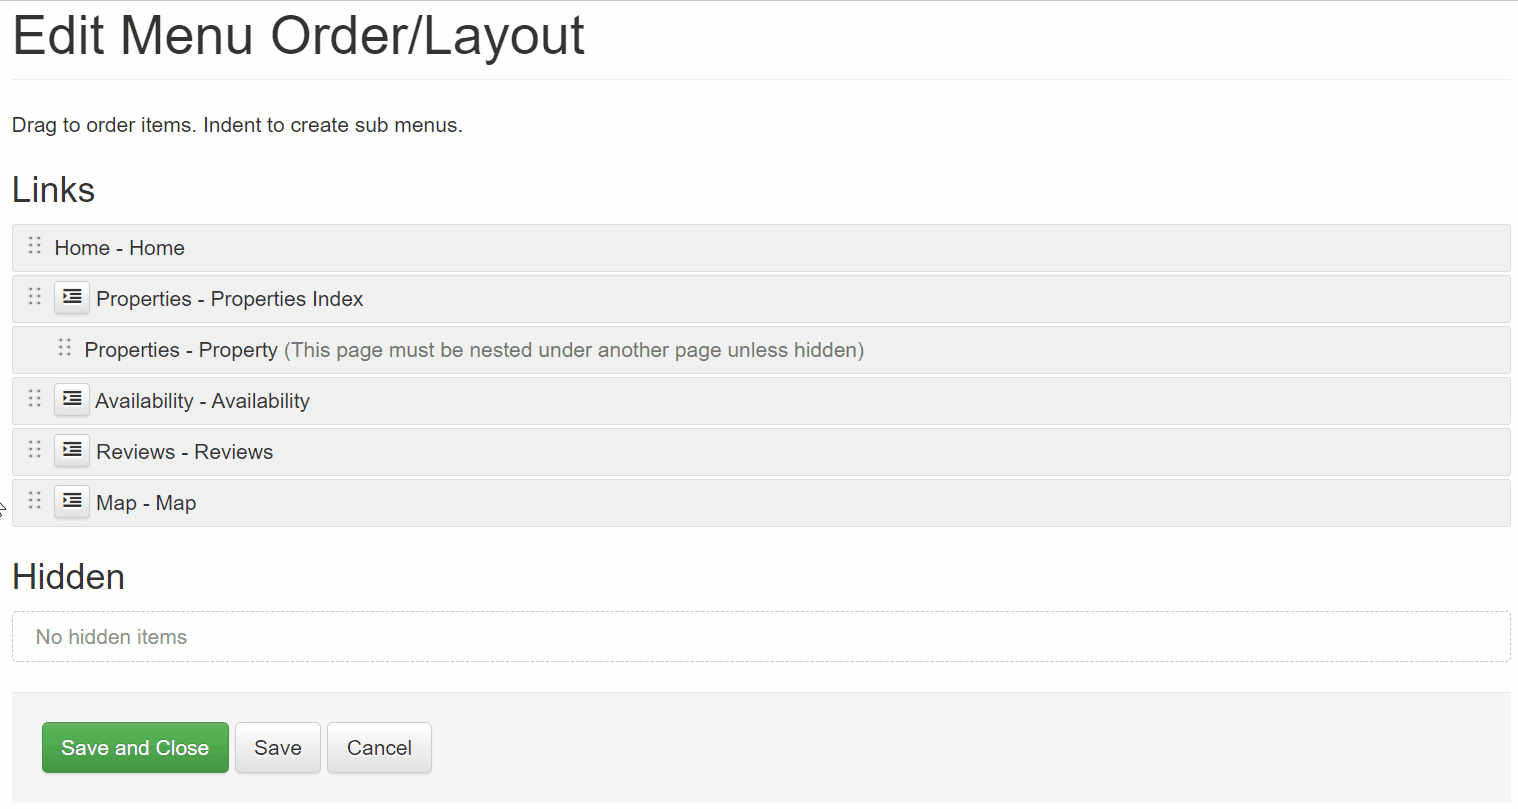
If you select Site Menu as your section type, all the links in your menu layout will be presented.

To rearrange the menu links, go to your Hosted Website Settings page, then click Menu Layout.

From there you can click and drag the menu links in the order you'd like.


You can also nest menu links underneath another by clicking the indent button.